How to launch the check-in kiosk
The kiosk is a self-service screen for your booth where attendees check themselves in. You enable it, customize the copy, then open its link on a tablet. Manager task.
- Open Events from your profile menu, pick the event, and open its Settings, then go to Booking & check-in and the Check-in kiosk section.
- Turn on Enable Kiosk. The setting saves on its own (you’ll see “Saved”).
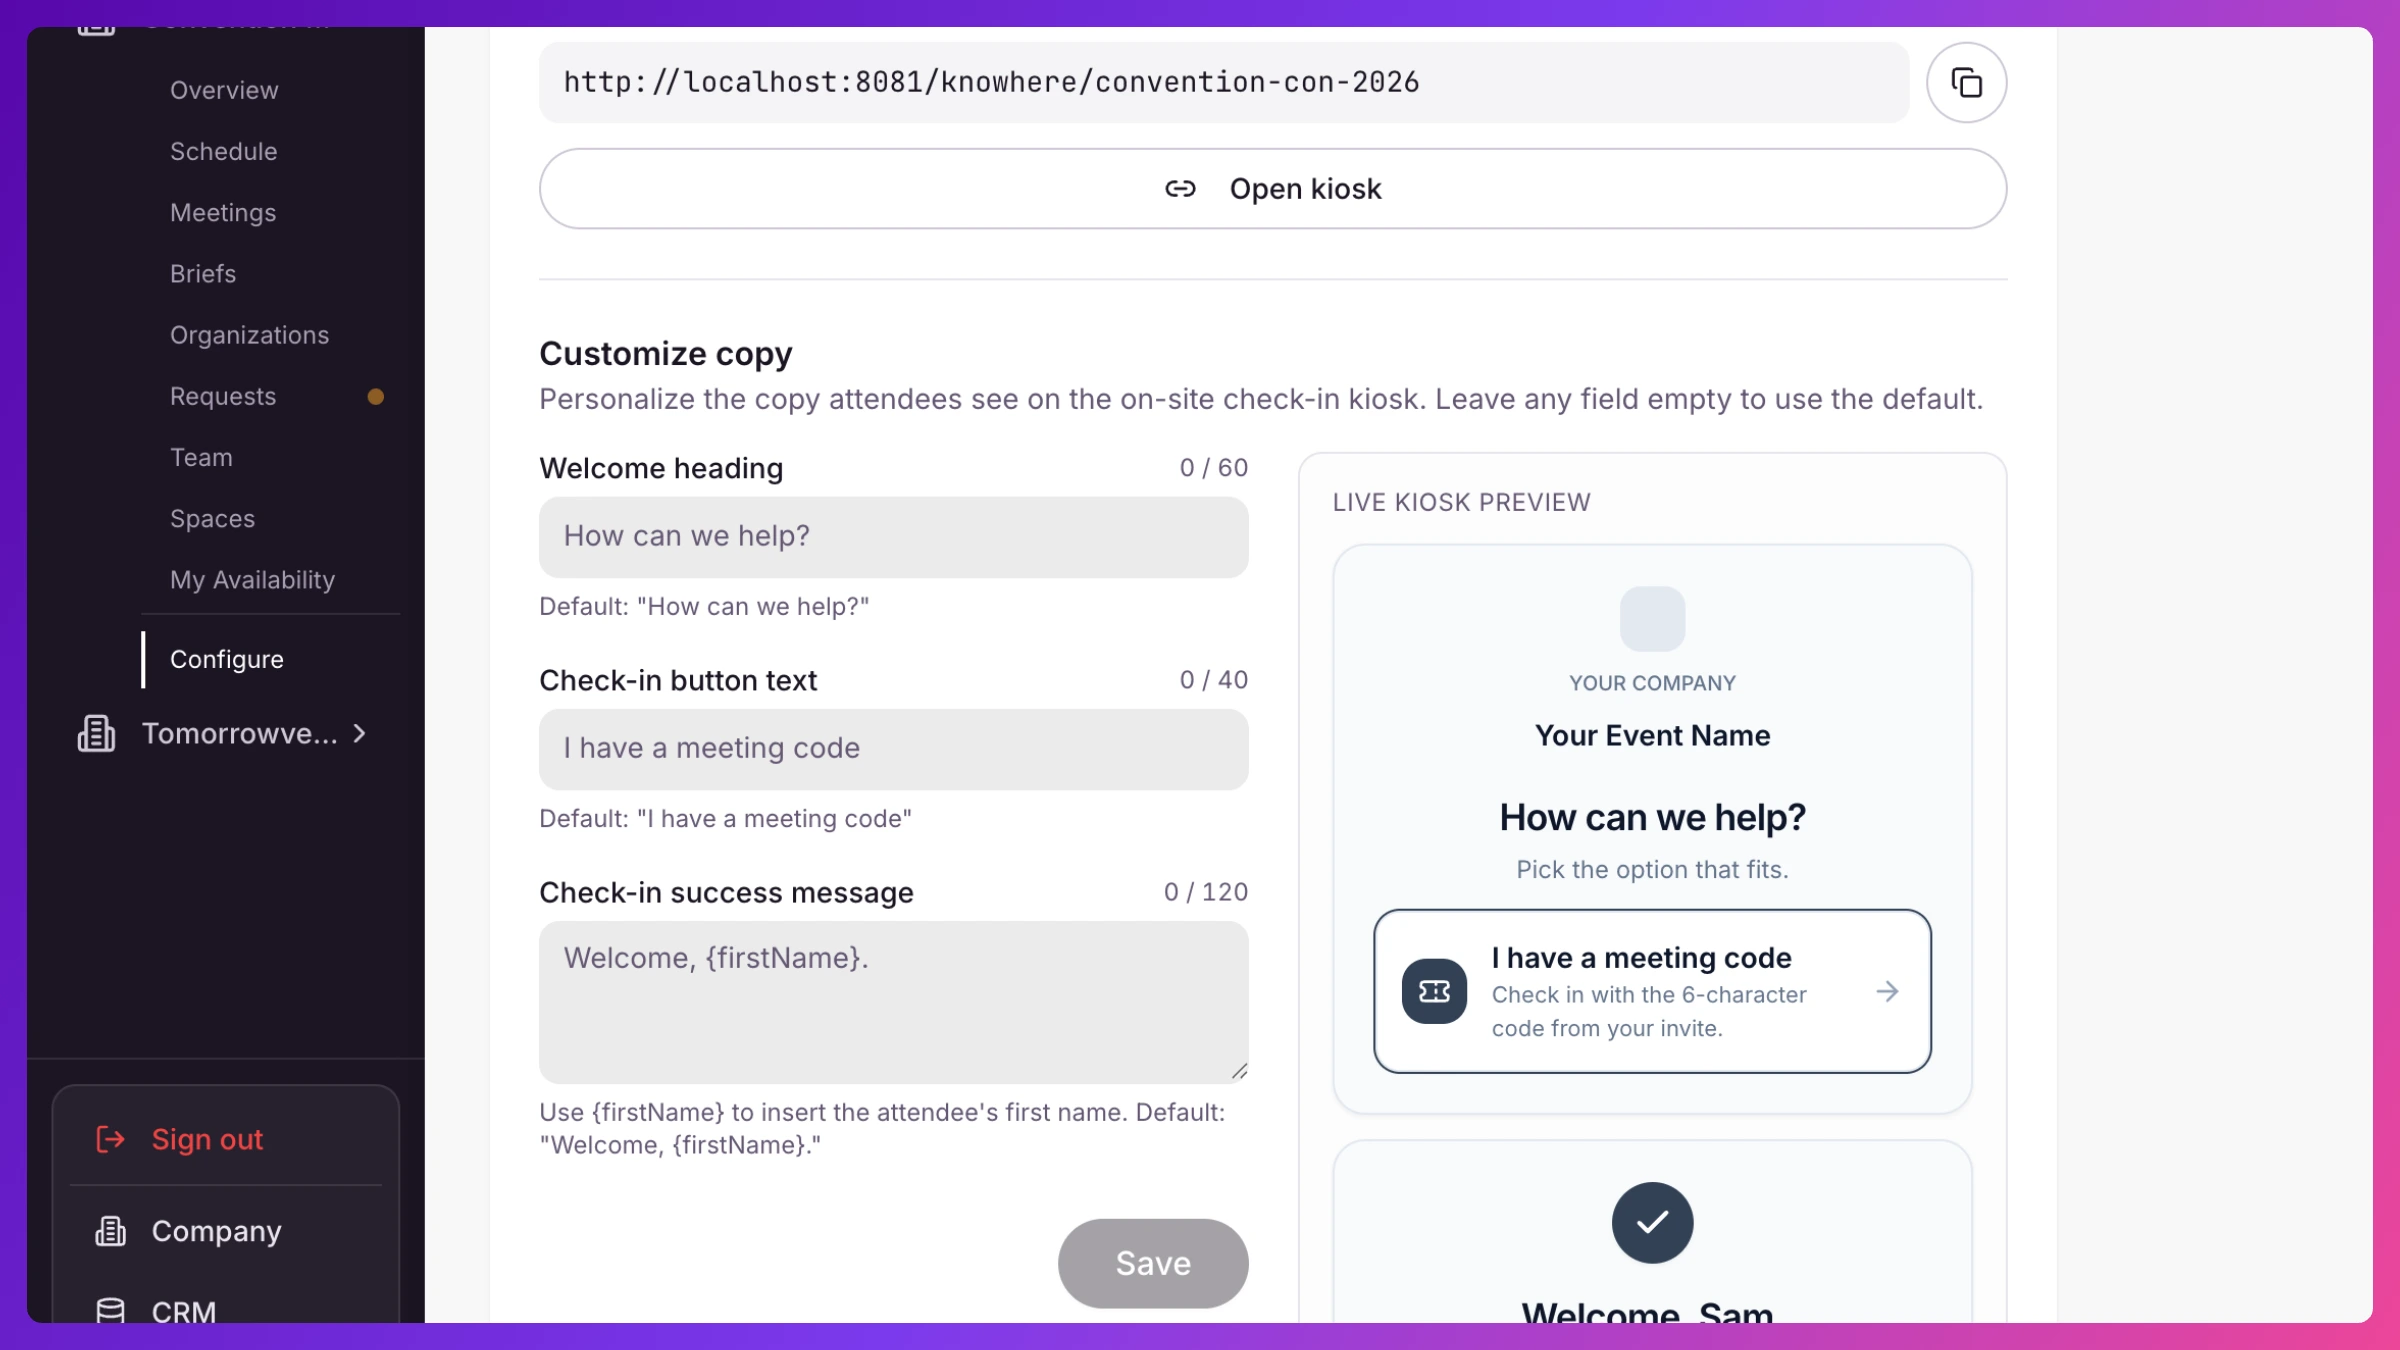
- Copy the kiosk link from the read-only field, or click Open kiosk to launch it in a new tab. Put that link on the tablet you’ll leave at the booth.
- Customize the copy (optional):
- Welcome heading, the greeting on the landing screen. Default is “How can we help?”.
- Check-in button text, default “I have a check-in code”.
- Check-in success message, shown after someone checks in. Use
{firstName}to insert their first name, for example “Welcome, {firstName}.”
- The live preview on the right shows exactly what attendees will see. Click Save when you’re happy.
What’s next
Section titled “What’s next”At the booth, an attendee opens the kiosk, enters the six-character check-in code from their calendar invite, picks their name, and confirms. Walk-ins can register there too. See Check-in & the kiosk for the attendee flow and the live walk-up queue.