How to approve or decline a request
Requests come in from your booking pages and the kiosk. Approving one turns it into a meeting. Manager task.
- Open All Requests from the left sidebar, or click an event and open its Requests tab.
- The queue is tabbed Pending, Approved, and Declined. Start on Pending.
- Each row shows who’s asking, which team member they asked for, the requested date and time, the duration, any demo station, and their reason.
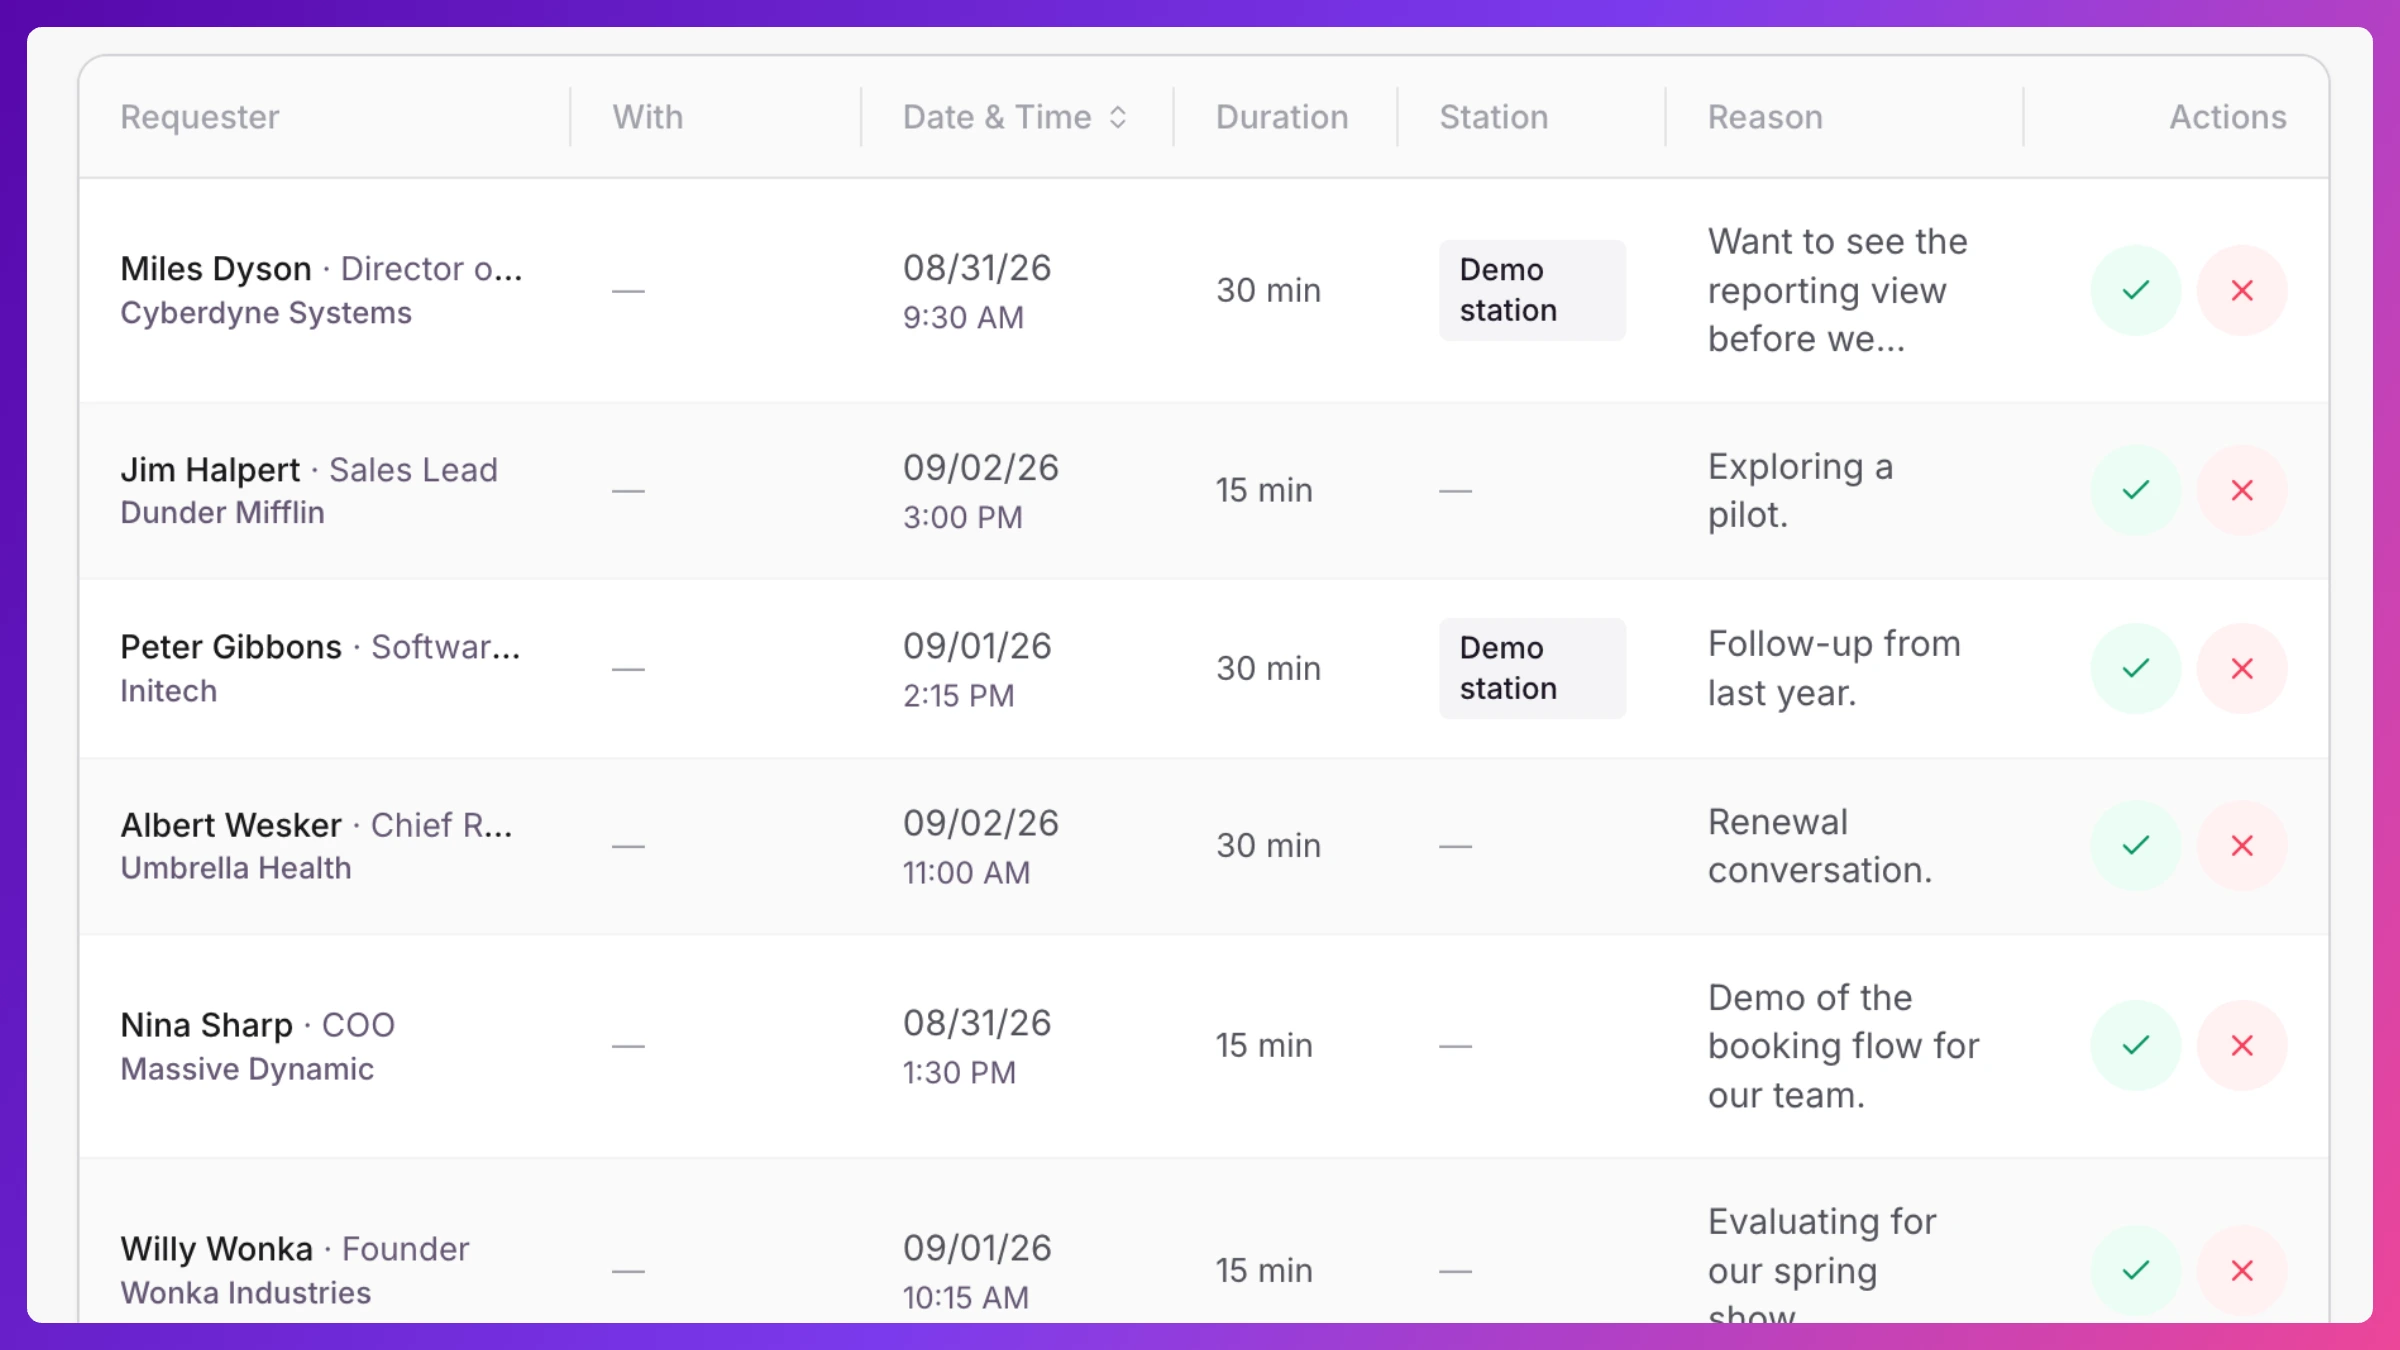
- To approve: click Approve & schedule. This opens the meeting form pre-filled from the request. Adjust the time if needed (the live conflict check runs here), then click Create Meeting.
- To decline: click Decline. Add an optional Reason, then click Decline Request. The request moves to the Declined tab.
Reschedule requests
Section titled “Reschedule requests”A guest who asked for a different time from their invite shows up in the queue too. Handle these from the event’s Requests tab, where they’re tagged Reschedule.
- The row shows the existing meeting and the guest’s proposed date and start.
- Click Approve new time. This moves the existing meeting (no new meeting is created) and emails the guest that it moved.
- If the proposed slot has since been taken, the meeting’s edit form opens pre-filled at the guest’s time with the conflict named. Pick a nearby time and save; the move and the request close together.
Good to know
Section titled “Good to know”The requester is emailed when you approve or decline (the on-submission acknowledgement is a per-event setting, off by default). Demo-station bookings you set to auto-confirm skip this queue and become meetings on their own. During the event, new requests also stream into the Requests & Walk-ups widget on the event Overview. More in Requests & public booking.