How to connect your CRM
Connect Salesforce or HubSpot so your accounts and contacts flow into Knowhere, and your meetings and summaries flow back out. Manager task, Enterprise plan (or the CRM Sync add-on).
Before you start: if you’re on Salesforce, your CRM admin has a one-time job to do. Send them Prepare your CRM first, or start here and use the Copy message for your admin button in step 6. HubSpot needs no advance work.
Connect
Section titled “Connect”- Open Settings → CRM Sync in the left sidebar.
- Under Available integrations, find your CRM.
- Salesforce: choose Production or Sandbox first. Sandbox is for testing against a Salesforce sandbox org.
- HubSpot: connects to your production portal. There’s no choice to make.
- Click Connect. Your CRM’s sign-in and permission screen opens.
- Sign in as a user who has API access and permission to read and write accounts, contacts, meetings, and notes. That user’s permissions are the ceiling on what Knowhere can do, so connecting as a restricted user quietly limits the sync.
- Approve the permissions. You land back on the CRM Sync page with the setup steps underneath your new connection.
Set it up
Section titled “Set it up”Setup is four steps. Nothing is lost if you leave: come back to Settings → CRM Sync and pick up where you were.
Step 1, Fields
Section titled “Step 1, Fields”This is the list of fields Knowhere will add to your CRM. It writes into your existing companies, contacts, meetings, and notes, only ever adds its own fields, and never changes or deletes yours.
- Review the two groups.
- Identity fields are required and can’t be unchecked. They hold none of your data; they exist so Knowhere recognizes a record it already synced instead of writing a duplicate.
- Reporting fields are recommended and optional. Leave them checked unless you have a reason not to. Without them, a summary arrives in your CRM as a block of text you can’t filter, report on, or trigger a workflow from.
- Click Next. The footer tells you how many fields will be added.
Step 2, Verify
Section titled “Step 2, Verify”- This step reads your CRM back and reports, per object, whether the field is Ready, Not created, or Not checked.
- HubSpot: Knowhere creates these itself, so they’re normally ready straight away. If one is missing, it’s usually a permission your CRM admin needs to grant. Reconnect, then Check again.
- Salesforce: Salesforce doesn’t let an app create schema, so a Salesforce admin adds these by hand. Click Copy message for your admin and paste it to them. It lists exactly which objects, which field names, which types, and which checkboxes.
- Click Check again once your admin says they’re done. Carry on setting up in the meantime if you like: anything missed is backfilled once the field exists.
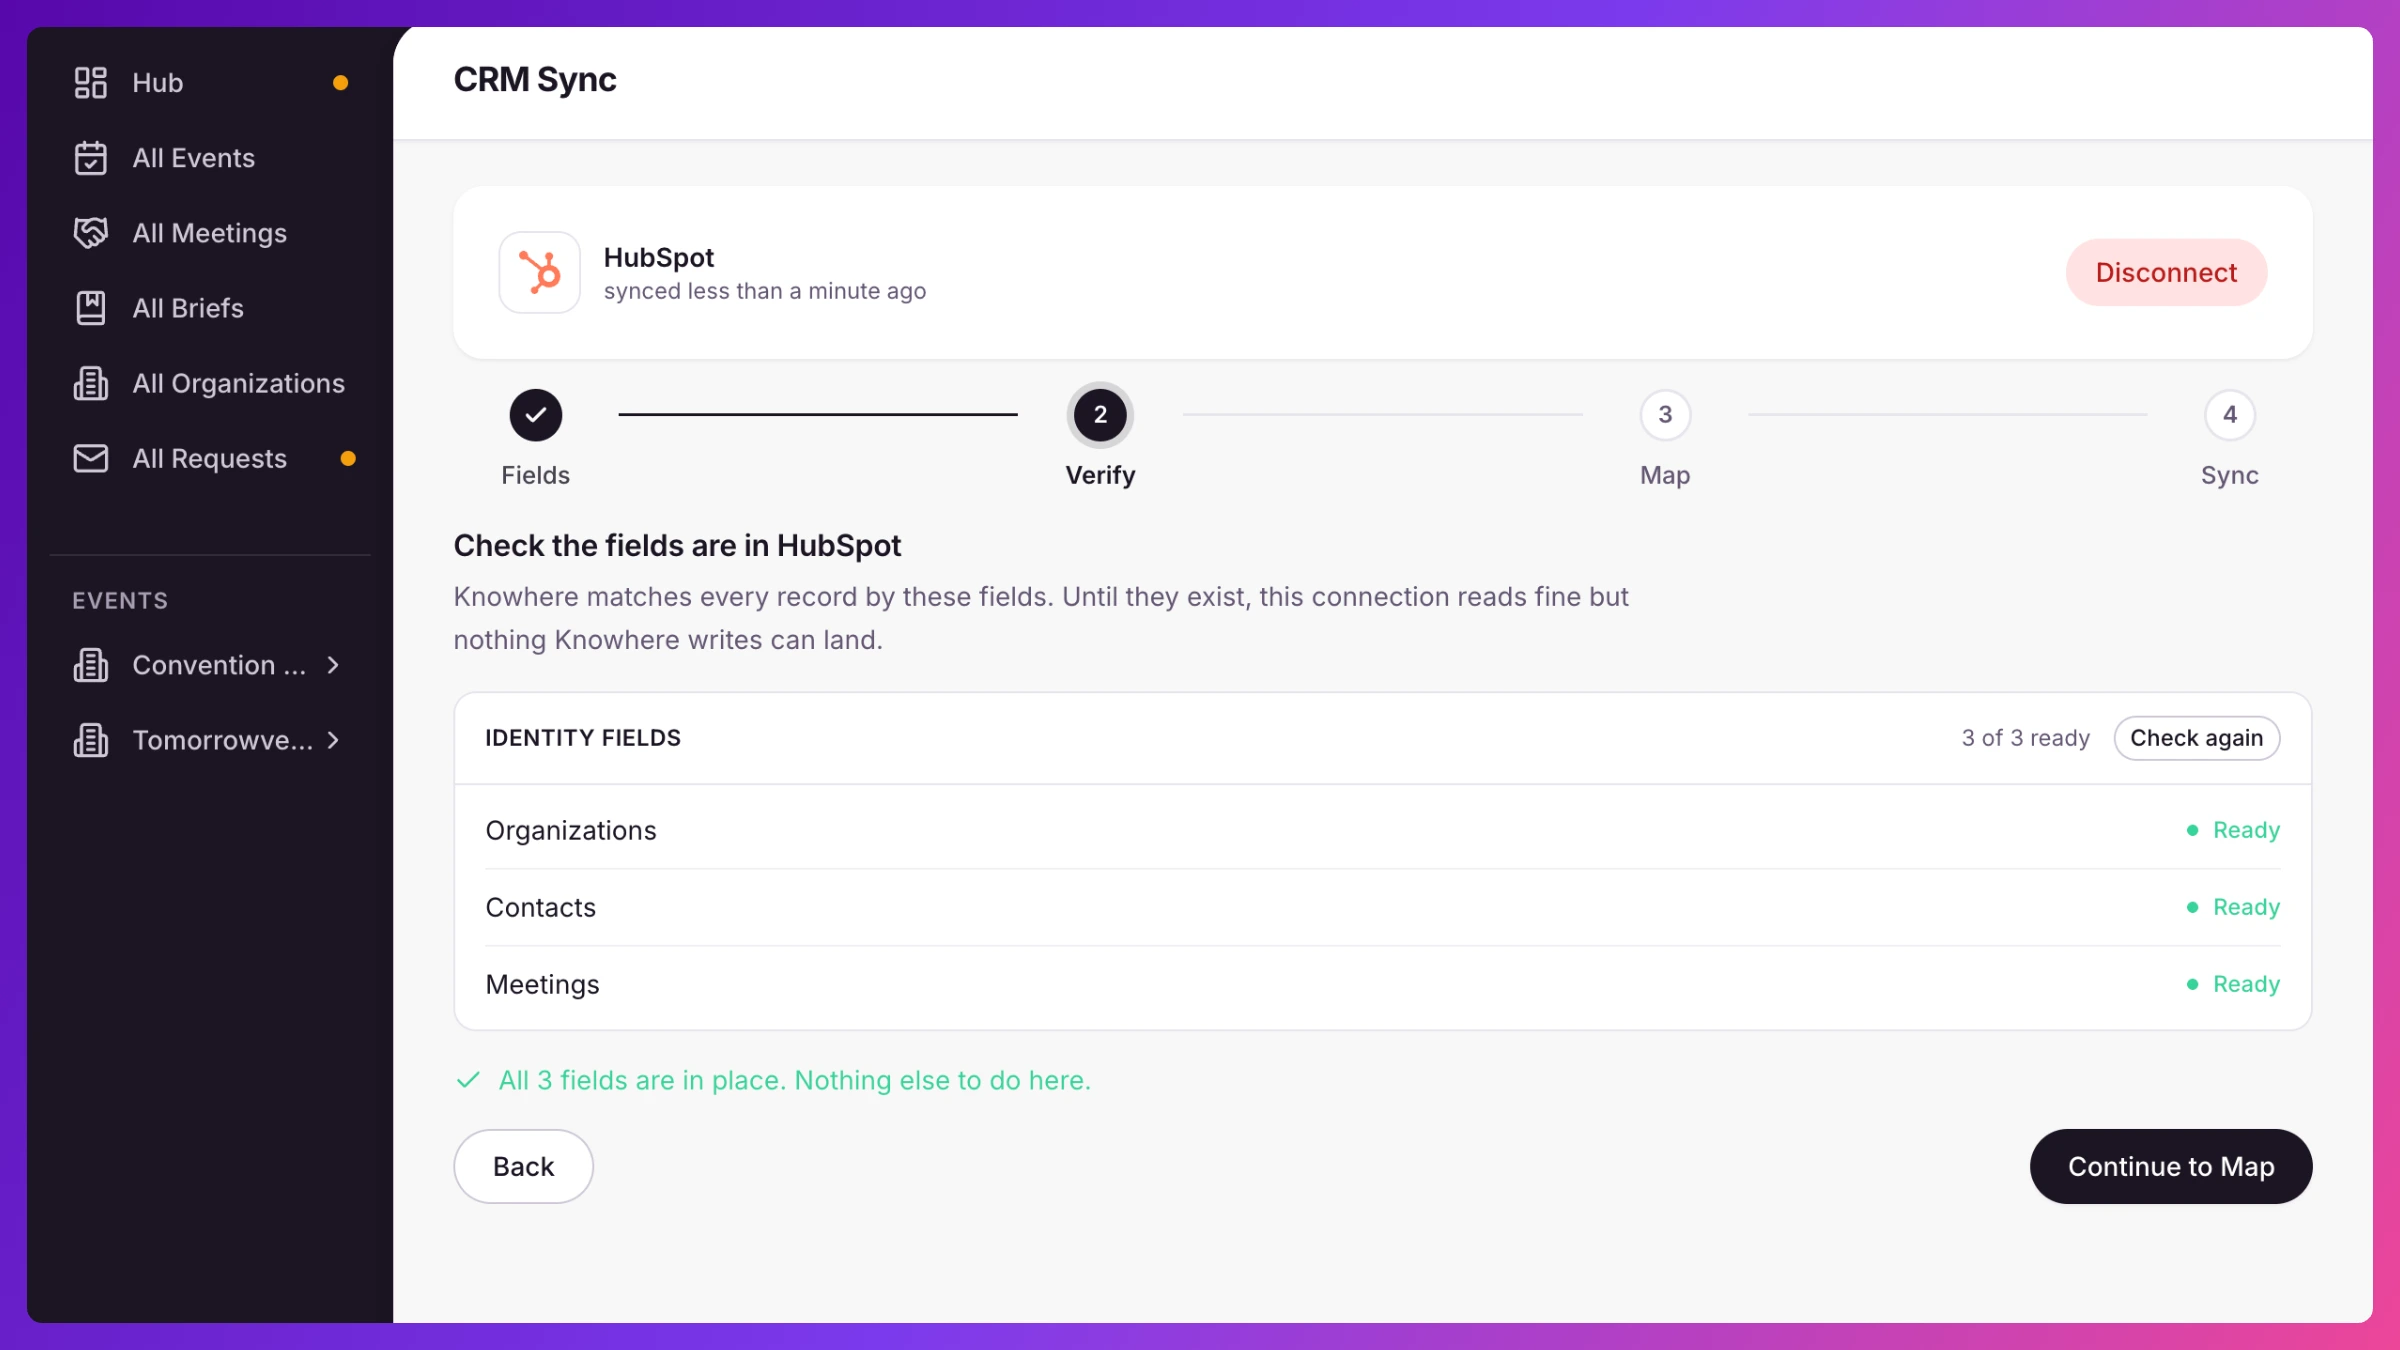
Don’t skip past a red or amber result. A connection with missing identity fields reads from your CRM perfectly well and cannot write a single thing to it. The status card says Setup incomplete when this is the case.
Step 3, Mapping
Section titled “Step 3, Mapping”- Match Knowhere fields to CRM fields. There’s a tab per record type (Required, Accounts or Companies, Contacts, then Meetings and Notes, which HubSpot groups together as Activities).
- Start on the Required tab. It collects every field your CRM insists on, across all record types, in one place. If your CRM requires a Country on every contact, this is where you’ll find out, and Knowhere won’t let you move on until it’s satisfied.
- Knowhere pre-fills the matches it’s confident about. Check them, and fix any that are wrong. Changes save automatically; you’ll see Saved beside the tabs.
- Only enabled mappings sync. Turn off anything you don’t want leaving Knowhere.
- Click Next.
Step 4, Sync
Section titled “Step 4, Sync”- Choose which accounts to pull in:
- A CRM list, one of your existing lists.
- A filter, for example
Industry = Technology. - Paste a list, account names or domains, one per line, from a spreadsheet or event registration list. Click Match accounts to see what matched, what didn’t, and what was ambiguous before you commit.
- Everything, meaning everything updated in the last 24 months, up to 50,000 accounts.
- Check the count under This will sync N accounts. If it’s wildly off from what you expected, fix the scope now rather than after the import.
- Leave Lightweight directory on. It indexes the names and domains of every account in your CRM without pulling full records, which is what lets your team members find an account in a picker even when it wasn’t in scope.
- Click Finish. The first import starts.
Check it worked
Section titled “Check it worked”- The card at the top of Settings → CRM Sync shows your provider, the org or portal you’re connected to, and Last sync. Give the first import a few minutes on a large scope.
- Open the meeting form and start typing a customer name into the organization picker. Accounts from your CRM appear badged Salesforce or HubSpot. Accounts that exist in your CRM but haven’t been pulled in yet show Not synced; picking one creates it on the spot.
- Open an organization with an open deal. Its pipeline should be there. If your team has already met that account at an event, its Pipeline section on that event’s page picks up the same deal.
- To push something back the other way, file a summary on a meeting that has already ended, then click Sync now. The note should appear on the matching CRM record.
If something goes wrong
Section titled “If something goes wrong”The card shows N records failed when a write didn’t land, linking to the list of what failed and why. Setup incomplete means identity fields are still missing, which blocks every outbound write.
Common causes and fixes are in the CRM Sync FAQ.
What’s next
Section titled “What’s next”- Have your team members link the specific opportunity a meeting is about, so meeting value rolls up correctly. See Meetings & calendar invites.
- Set account owners. Knowhere matches CRM owners to Knowhere team members by email address, so mismatched emails are the usual reason an owner comes through blank.
- Full behavior is in CRM Sync.